Want to take a great portrait shot that everyone will think is amazing, but really didn't take that much effort? Then try taking a "close-up" shot! By taking a head and shoulders shot, you can get a great picture without having to fiddle so much dealing with posing and background.
Here are the secrets of why it works, and the tips-and-tricks to make it even better.
Secrets
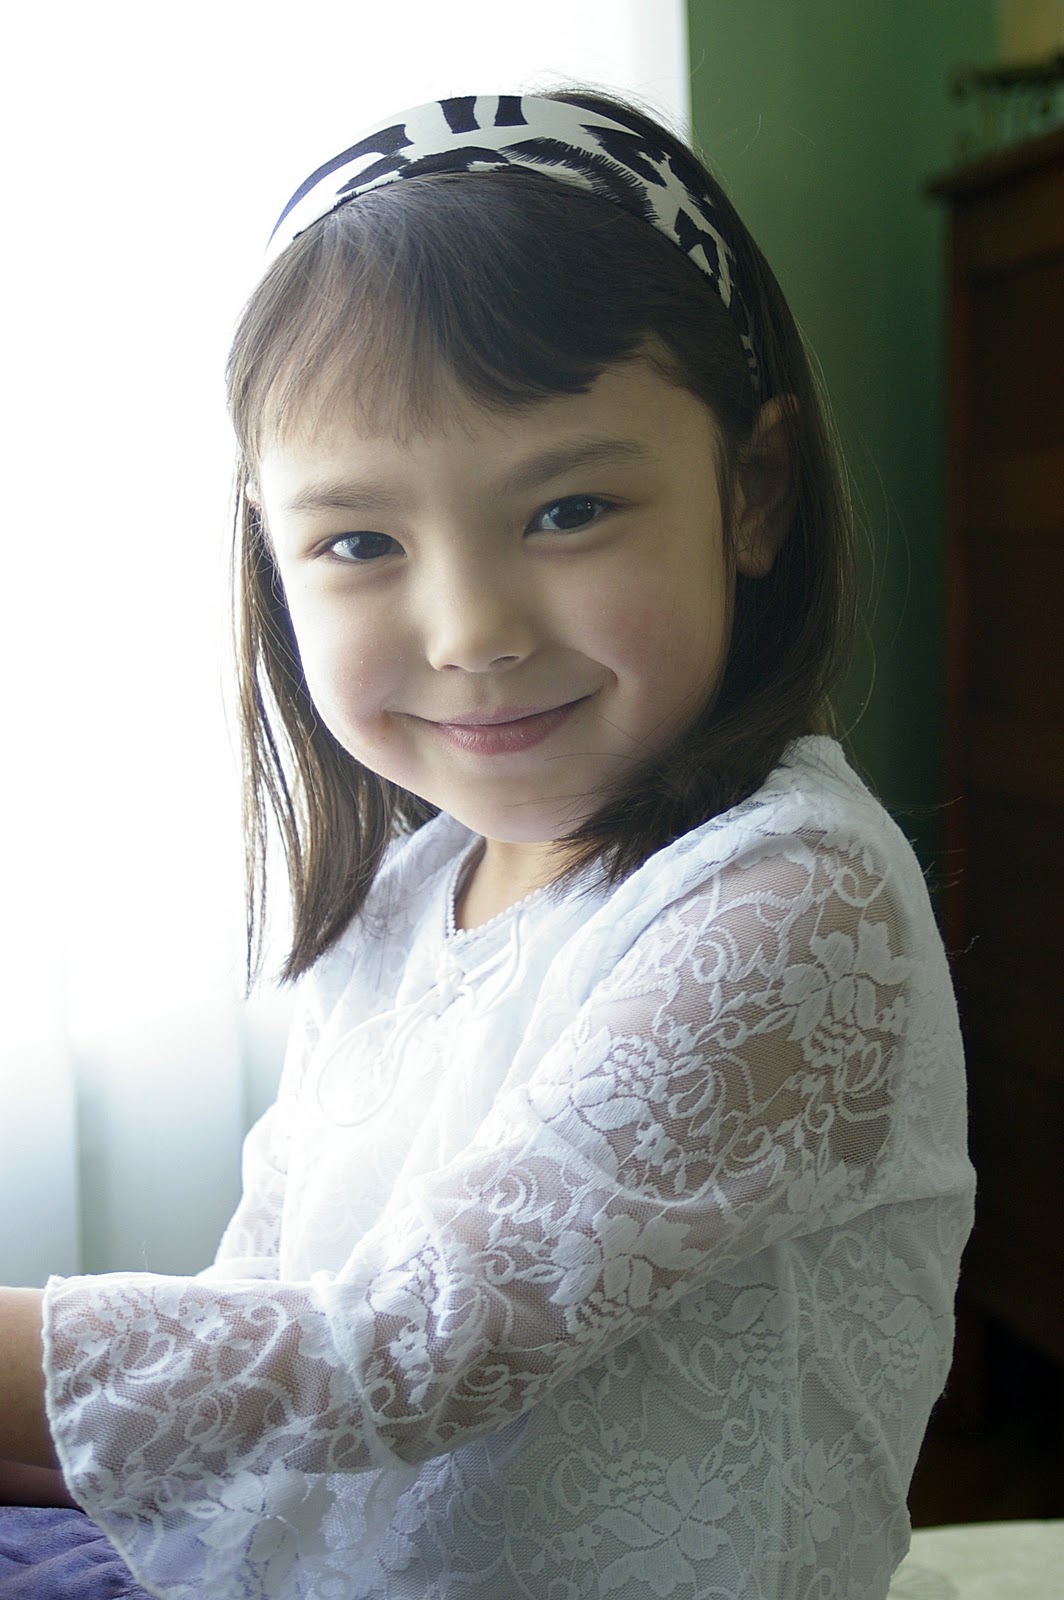
1) Fill the picture with just Head and Shoulders -- Focusing in on your subject's face (and a bit of their shoulders) really makes for a bold and dynamic picture. Something that can really breakthrough the sea of regular snapshots!
2) Eliminate distracting background -- By filling the picture with mostly the person's head and shoulders, you are getting get rid of any distracting background, allowing your viewer to concentrate on the portrait.
3) Eliminate arms and hands -- It can be difficult to get your subject to move their arms and hands in a "natural" looking position, so by cropping them out of the picture you don't have to worry about them!
Tips-and-Tricks
1) Back up about 7-10 feet and zoom in on your subject using your camera's Telephoto position on the lens. -- When you take a picture at longer focal lengths (ie. "telephoto" position), rather than shorter focal lengths (ie. the "wide-angle" position), the lens takes a more flattering picture. When you take a close-up picture at the wide-angle setting, it tends to make people's faces look fatter. When you take a close-up picture at the telephoto setting, it makes faces narrower and appear more natural and pleasing.
2) Move your subject away from distracting background -- The other thing about taking a picture at longer focal lengths (ie. "Telephoto" position) is that it has a better chance of throwing any distracting background out of focus better, again focusing your viewer's attention on your subject. To make this even better, move your subject away from the background (ie. wall, tree, or anything else behind them.). And if your camera has the option to change the aperture setting, then try to use a low setting.
3) Turn off your flash and get some natural side lighting, such as from a window -- If at all possible, try to take the picture without using your flash. If there is a window providing lots of light, position your subject to one side. Or if there is a lamp, re-position it to provide some direction light on one side of your subject's face. This directional light ends up lighting only one side of a persons face, making the dimensional rendering much more impactful and because only half the person's face is lit up, their face may seem more slim.
4) Pick a North Facing Window with Sheer Drapes -- Also, if you decide to use window light as your main lighting, try to pick a north facing window, and especially pick a window with sheer drapes. Doing this reduces the chance of strong direct sunlight from making your portrait too contrasty.
And have some fun with it! Try zooming in and zooming out and trying out different things!

Take care,
Glen -- DigicamJunkie.com
No comments:
Post a Comment